Mailmerge, Hyperlink and Animation
Mailmerge using an Excel spreadsheet
First, you must prepare and set up data in Excel for mail merge. It is the most important step in mail merge process. Create column names in your spreadsheet match the field names you want to insert in your mail merge. For example, to address readers by their first name in your document, so you’ll need to separate columns for first name, middle initial, last names. It is just like this:
After inserting and filling up all the data in columns, you must save it for you to create a mail merge.
To start the mail merge, go to Microsoft word and click on the Mailings tab, and in the Start Mail Merge group, click Start Mail Merge.
Click Step-by-Step Mail Merge Wizard

To start the mail merge, go to Microsoft word and click on the Mailings tab, and in the Start Mail Merge group, click Start Mail Merge.
After that, the select data source will appear, so we must select the document that we will merge. After you choose it, the Mail Merge reverts to Use the current document.
After you click the document, the select table will appear. Click the ok button.
By clicking the start merge field, you can now insert the data.
So you will see that the list has been created. You have the option to edit the recipient list.
Note that when you insert a merge field, they are surrounded by chevrons (« »). You can preview it by selecting or clicking the preview results.
How to add and remove animation effects in PowerPoint
How to add an animation effect to text or objects
- 1.Select the text or object you need to animate
- 2.Click on the Animations tab in the navigation ribbon.
- 3.Click Add Animation.
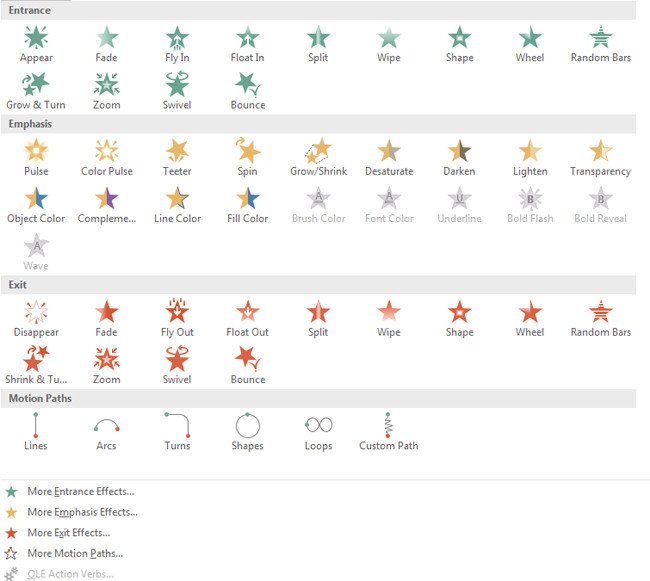
- 4. Select an animation effect from the list.
You can apply more than one effect to the same object. This can only be done by clicking on Add Animation. If you try to add another animation by any other means, you will only replace the previous effect.
The default naming convention for animation effects could be somewhat confusing to look at. The ability to rename animations to clarify target objects is available in the Selection pane from the Home tab. Double-click on a name to be able to edit it.
How to remove an animation effect
1.Select Animation Pane from the Advanced Animation group.
2.Select the animation effect from the pane on the right side.
3.Click the Down Arrow to open a drop-down list.
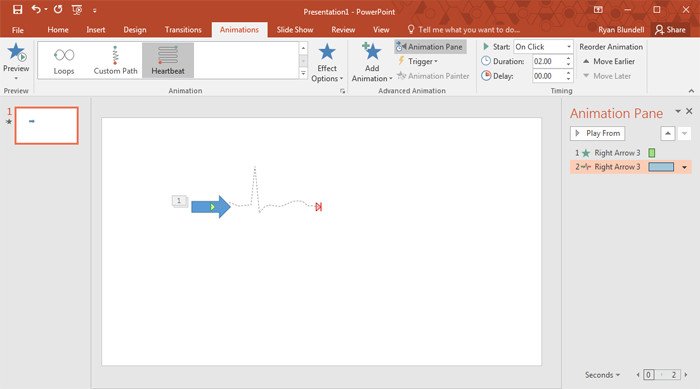
How to change the order of the animation effects
- 1.Click the Animations tab in the navigation ribbon.
- 2.Select the Animation pane from the Advanced Animation group.
- 3.Select the Animation you wish to move in the Animation pane.
- 4.Select either the up and down arrow, next to the Play From button, to move the animation earlier or later in the sequence.
How to set the start time and duration of an effect
- 1.Navigate to the Animation pane.
- 2.Select an animation effect from the list.
- 3.Click the Down Arrow to the right of the effect listing.
- 4.Select Timing from the drop-down list.
- 5.Select Start from the Timing tab to select an option.
- 6.Choose a value under the Delay option.
- 7.Choose the length of the animation effect under the Duration section.
- By adjusting the duration, you are altering the speed of the animation, which can potentially alter the impact the effect has on the audience.
- How to activate an animation effect by clicking on it
- Click on the object or text in question.
- Click on the Animations tab.
- Add the animation as described in How to animate text or objects in PowerPoint 2016.
- Locate the Advanced Animation group.
- Select Animation pane.
- Select the object or text to be triggered with a click.
- Select Trigger from the Advanced Animation group.
- Select On Click from the drop-down.
- Select the object to confirm.
How to begin an animation during audio and video content
- Select the audio or video clip on a slide.
- Click Play from the media controls.
- Click Pause where you want to add a bookmark.
- Locate the Playback tab in the Video Tools section.
- Select Add Bookmark from the Bookmark group.
- Select the Animation tab.
- Select Advanced Animation.
- Select Animation pane.
- Select an animation effect.
- Select Trigger under Advanced Animation.
- Select On Bookmark from the drop-down list.
- Choose the bookmark you have set.
How to Repeat and Rewind an animation effect
- Select the Animations tab.
- Select the Show Additional Effect Options icon.
- Select the Timing tab.
- Select an option from the Repeat drop-down.
- Click the Rewind when done playing checkbox.
How to use motion path animation effects in PowerPoint
How to add a motion path to text or objects

- Select the Animations tab.
- Click Add Animation under the Advanced Animation group.
- Navigate to the Motion Path group of effects.
- Select a path.
If you were to select the Custom Path option, you will be required to draw out the path to be taken. Click and drag to create a visible, freehand path or just point and click to create lines with connection points. Double-click the left mouse button to mark the end of the path and see a preview of the movement.
How to modify a motion path
- Select Effect Options in the Animation group.
- Select from the presented motion alternatives to change the path.
- Navigate to the Path group in the drop-down.
- Click on Edit Points.
- Click on any points on the path and drag to a new location.
- Click Preview to see the revised animation in action.


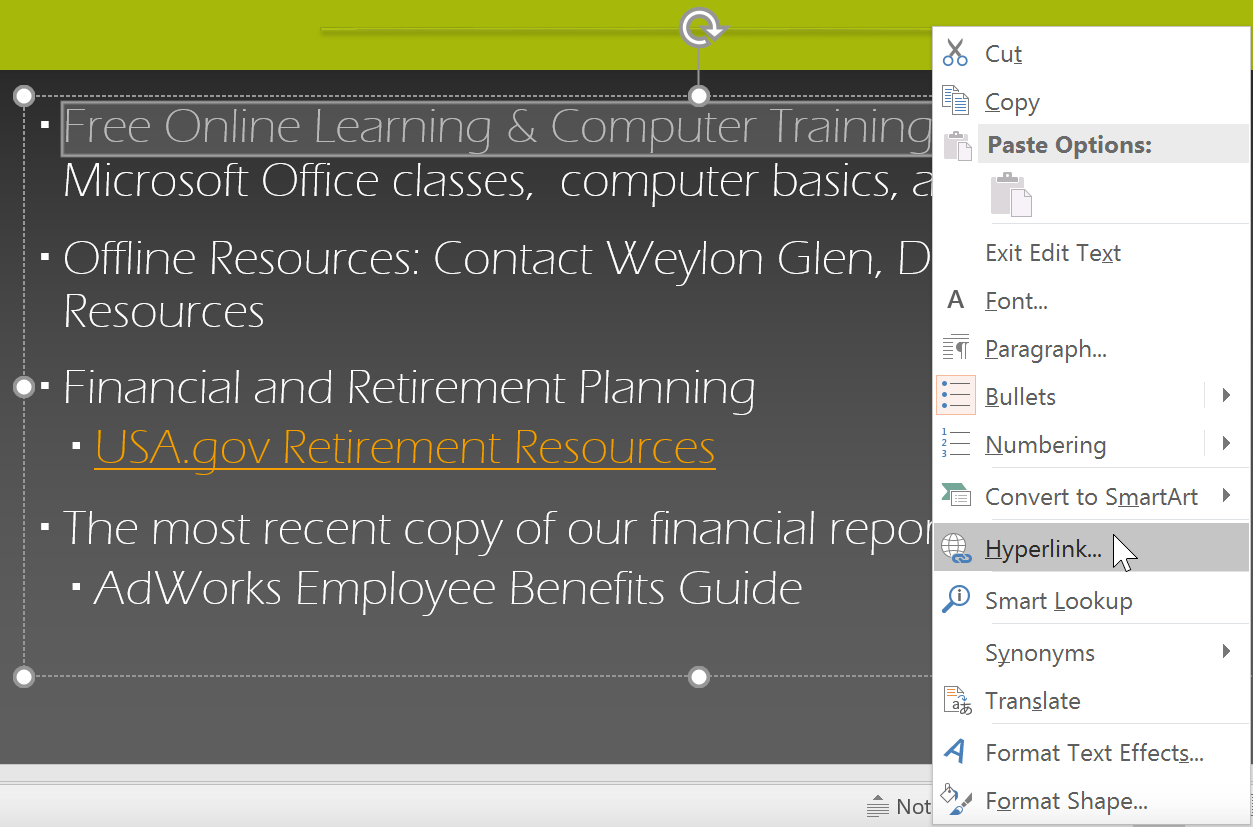
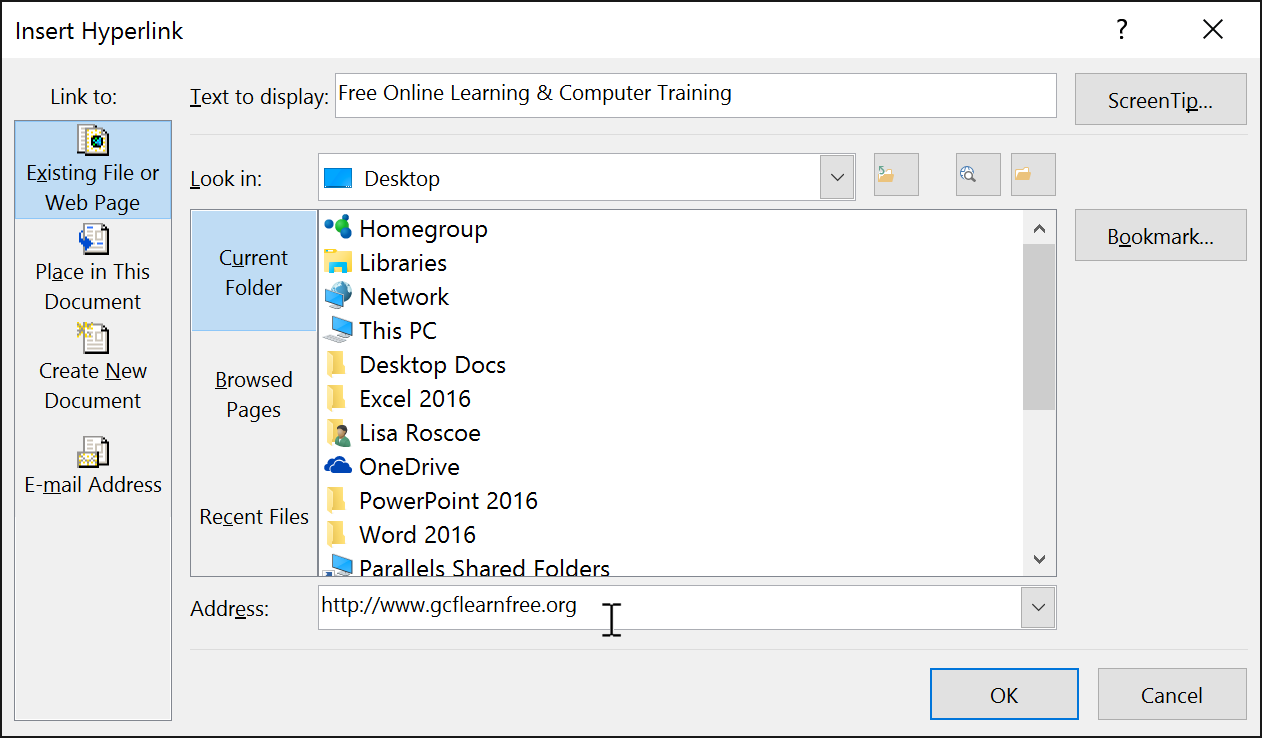

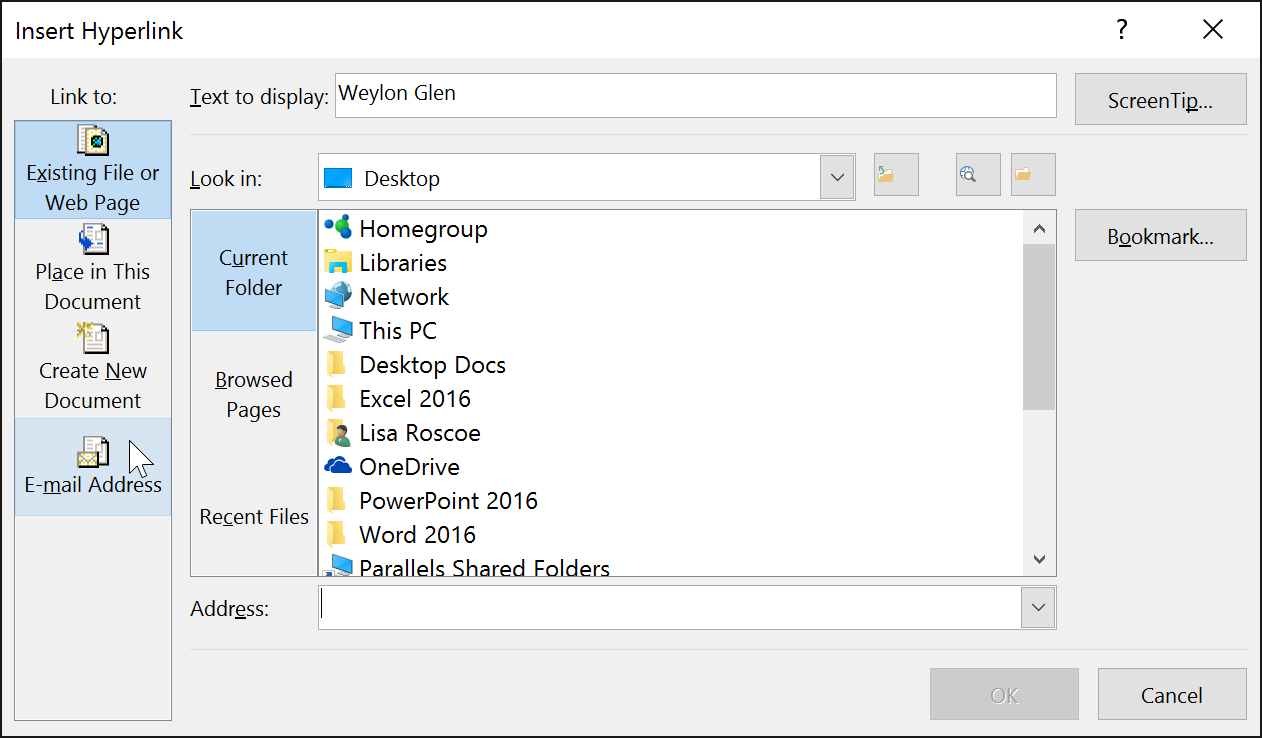




Comments
Post a Comment